This is where the subtitle goes
After an introduction in part 1, we’re now ready to dig in and get our hands dirty. We discover that the server is running an old version and it doesn’t have any DNS configured. We make our first steps towards a DevOps mature deployment, by moving it to a brand new server in Azure.
As I promised in the introduction, I’ll take a moment here and there to talk about some of the soft details of any project. Before we’re getting started, it’s a good idea to have an idea how what we want to accomplish, and more importantly, why.
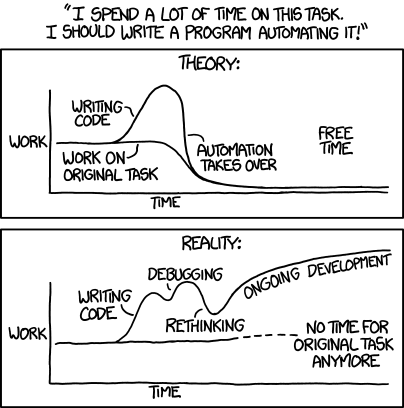
In process automation, there’s a principle called USA, and it has nothing to do with God’s own country. It stands for:
It’s very tempting when we see something that is clearly ineffective to jump directly to “automate it all!”, but how do we know that a good way to invest our precious time? The reality is, it’s impossible to automate something we don’t understand. And when we do understand it, a lot of the time simplifying it will make all the difference in the world, removing the need for automating it.
I know this sounds a bit off, coming from someone whose blog is primarily focused on automation, but, we only have limited time, so we need to make sure that we’re attacking the issues that gives us the largest return on our time investment.
Understand is simply active listening, which means if we can ask someone, listen very carefully to their answer, ask follow up questions and make sure that you truly understand why they’re doing what they’re doing, and what they want to accomplish. The next step is to look through documentation and the actual solution itself, to learn as much as we can. When we feel ready, it’s time for the part of the principle, simplify.
Simplify is all about looking for unnecessary steps. An example could be a process where an employee orders something work related, where a manager is required to approve all requests. Awaiting approval is something that can greatly slow us down, and perhaps it’s not necessary for a manager to approve a new mousepad, but it still makes sense for a new laptop. Perhaps it’s possible to just have a stack of mousepads available that employees can help themselves to, giving the employee the power to fix their own mousepad situation.
Automate can be time consuming, but if we simplified the process and it’s being used multiple times a day by multiple employees, we may be able to save people a lot of time by automating it. Because we simplified it, we also have a better understanding of the process, and it makes it easier and faster to build the automation.
When we log in, we’re greeted by an old OS, Windows Server 2008 R2. It only seems appropriate that the start of our DevOps journey is an outdated OS.
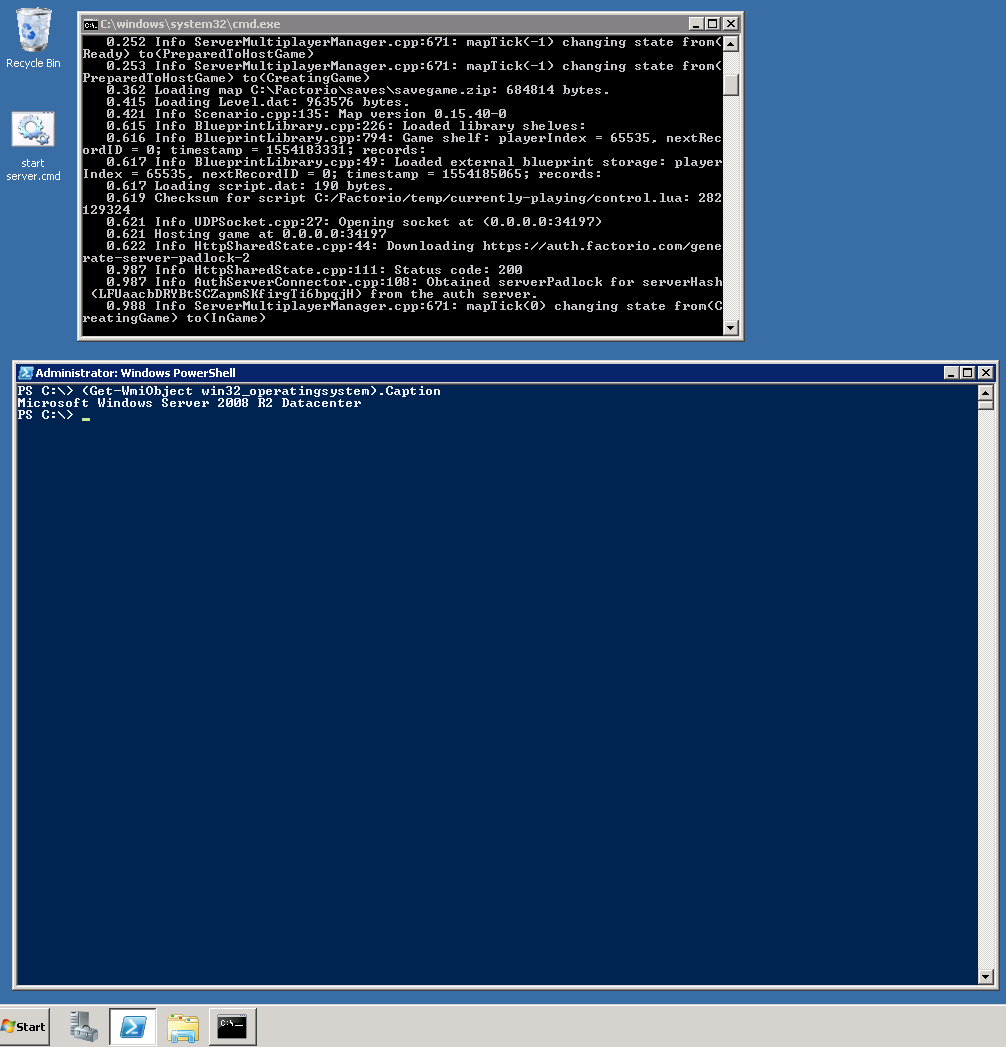
We can also see that a cmd.exe is running, which is probably the Factorio server. Whoever installed it was also nice enough to save a batch file on the desktop called “start server.cmd”. Does this need to be manually started when the server is rebooted? Is it really running as an administrator? We’ll put those down as a concern.
Inspecting the batch file gives a pretty good idea where the server is installed.

Let’s check what version of Factorio is running, and what the latest version is.

It looks like the version we’re running is 0.15.40, and the latest one is…
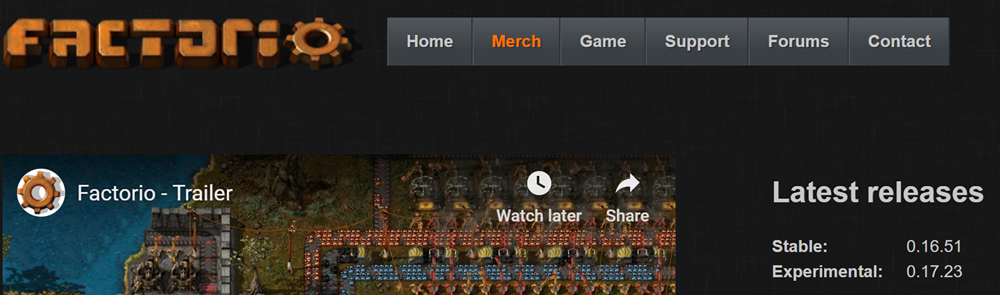
…0.16.51. Oh dear, need to do something about that too.
Next step, which ports are the server listening on? Let’s run netstat to get a better idea.
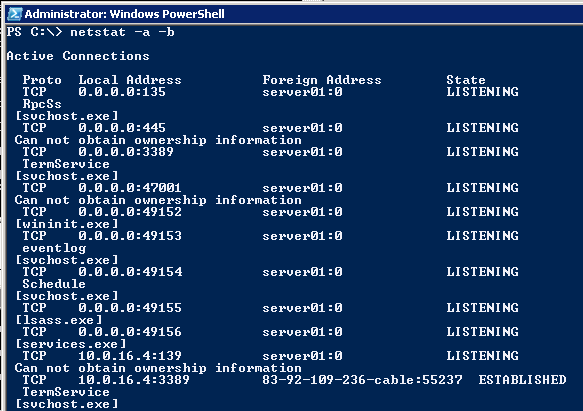
By default, netstat only shows outgoing connections. By using ‘-a’, it will show all listening connections as well, which is what we want for a server that’s receiving connections. Next, because the default output from netstat only shows protocol, local IP and port, remote IP and port and state, it can be difficult to figure out which is from our Factorio server. ‘-b’ shows the executable file that’s responsible for the connection.
If we look at the output, we can see that two connections are related to factorio.exe:

The image shows an outgoing connection, which we’re not interested in right now.

The next one shows the listening port of Factorio. As we can see, Factorio uses UDP instead of TCP, and it listens on all available IP addresses (indicated by 0.0.0.0) on port 34197. This is important if we move the Factorio installation, because this port (UDP 34197) needs to be open before anyone can connect.
The last one, [::]:34197, means that it listens on all available IPv6 addresses as well. We’re not interested in that.
It also looks like people are just using the public IP address to connect to the server, no DNS name. This makes it more difficult to switch to another server, because we would need to move the IP address as well.
Likewise, we haven’t found any backups of the data on the server.
Looking at the above, running on an outdated OS is something we want to fix, and we’ll deploy the new server in Azure. To make this transition as easy as possible, we definitely need a DNS name. And while we’re at it, lets make sure we’re running the newest version of the game.
That means we’ll focus on these improvements for now:
While it’s annoying that an admin needs to automatically start the server, either if the VM reboots or the server crashes, it’s less of an issue than running an outdated OS version, and we risk that our efforts doesn’t work on Windows Server 2019, which also goes for the restricted user account.
Postponing doing something about backups hurts me, but, we’re keeping the old server, which will act as a backup. Furtermore, the copy we’ll move to the new server will also serve as a backup. Shortterm, that’s a lot better than the current situation.
All actions are available through API’s, which means we can completely automate the VM deployment. But right now we just need to do it a single time, and the Azure Portal is the easiest when we need to do these actions that don’t need to be reproduced and don’t need to be scalable.
In Azure, everything must be placed inside a resource group. Resource groups are logical containers, and are usually used to group similar resources together. There’s a lot of considerations around how to structure your resource groups and where to place the resources, both the lifecycle of the resources matters, and also who needs access to them. For our purposes, we’ll keep it simple and just create a single resource group and place our new VM inside it.
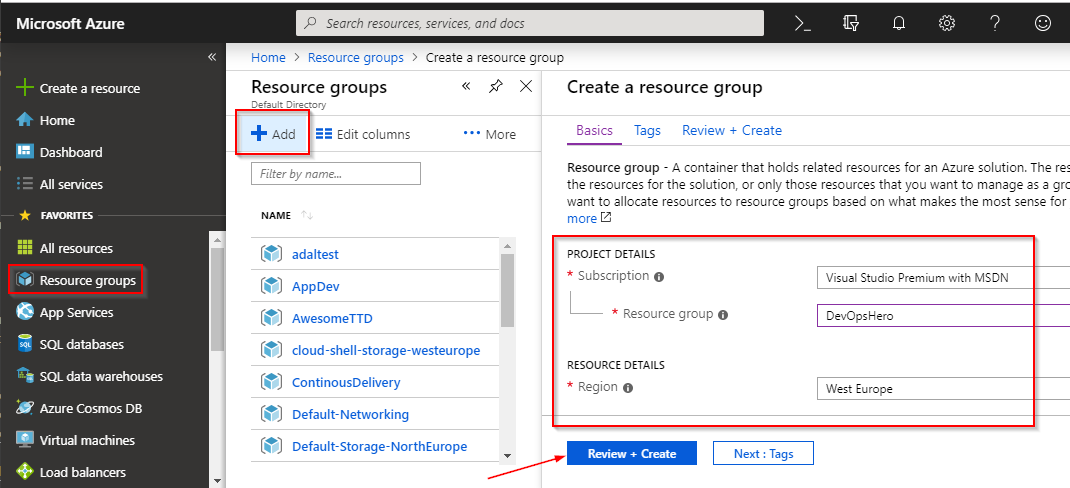
In the Azure Portal, click Resource groups on the left menu and click Add on the new blade. Choose subscription, name and region. For the region, you can choose a different region than all the resources you put inside of it, but you should generally avoid that. Make sure you choose the same region you’re going to deploy your resources to.
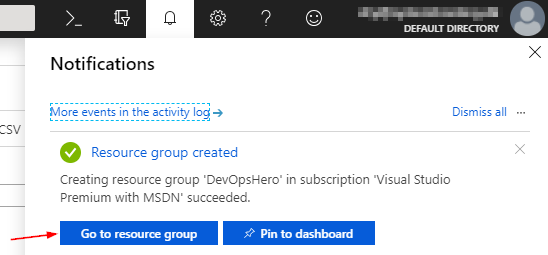
When your new resource group has been created, a notification wil appear and you can simply click Go to resource group.
. Unlike VM’s, you pay for the disk 24⁄7.
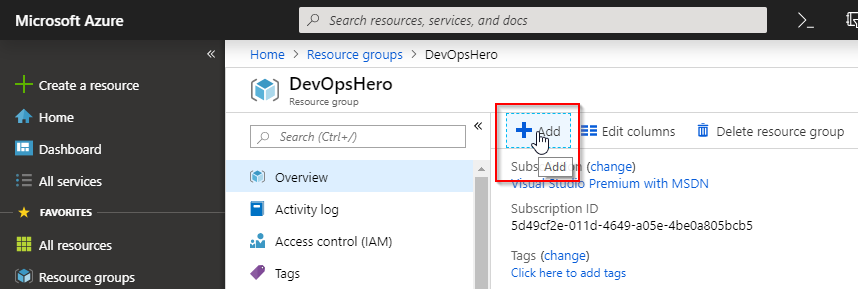
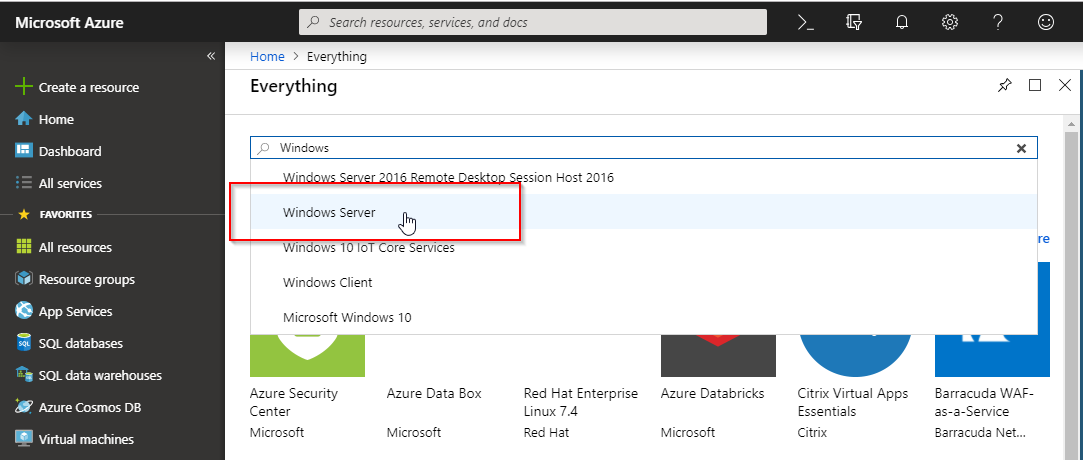
Inside the Resource Group, click Add.
When you’re prompted what you want to add, type ‘Windows’ and select Windows Server.
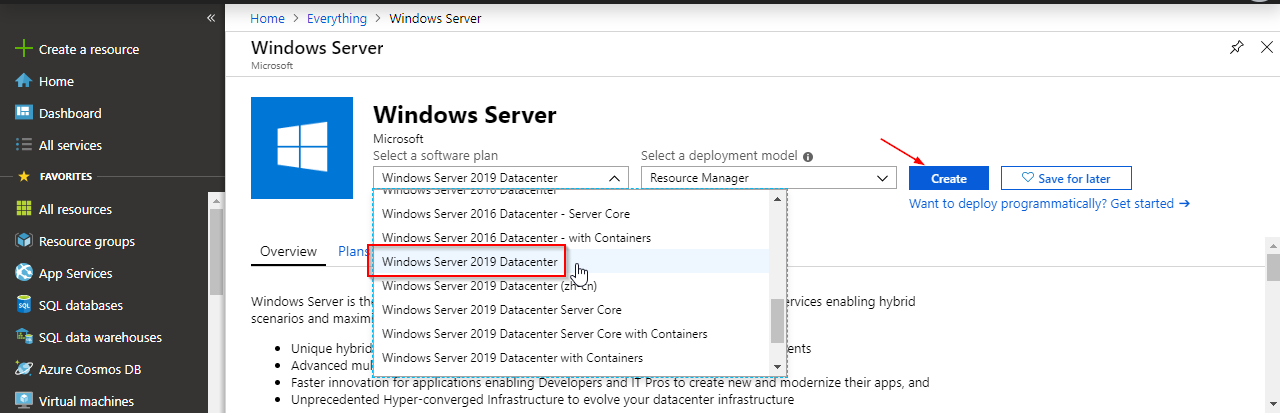
In the Select a software plan drowdown, select Windows Server 2019 Datacenter and click Create.
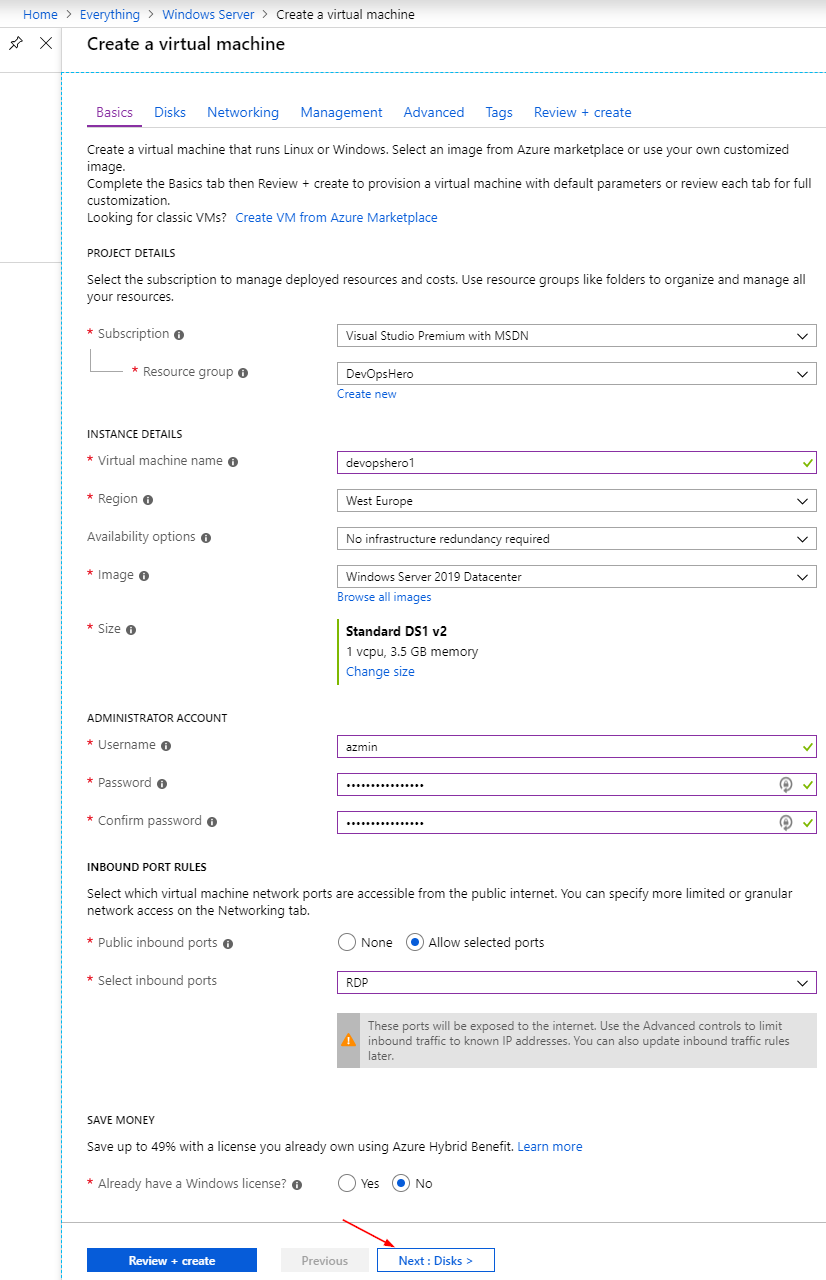
Next we’re presented with a lot of questions about how to create our VM. Below you can see my choices.
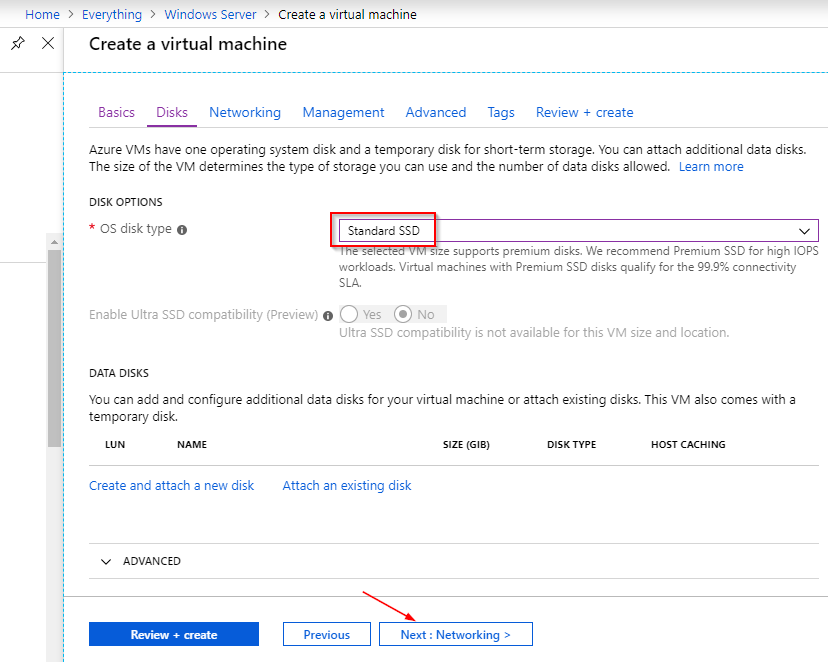
For the disk I’m choosing a Standard SSD for cost/performance reasons, but it’ll work fine with a Standard HDD. Be aware that, in contrast to a VM where you pay by the minute it’s turned on, you pay for a disk for the duration it’s provisioned, no matter if anyone is using it, and only deleting it will remove the cost.
You can see more information about Azure disk pricing here.
Except for allowing RDP for inbound connections, I’m just going with the default settings.
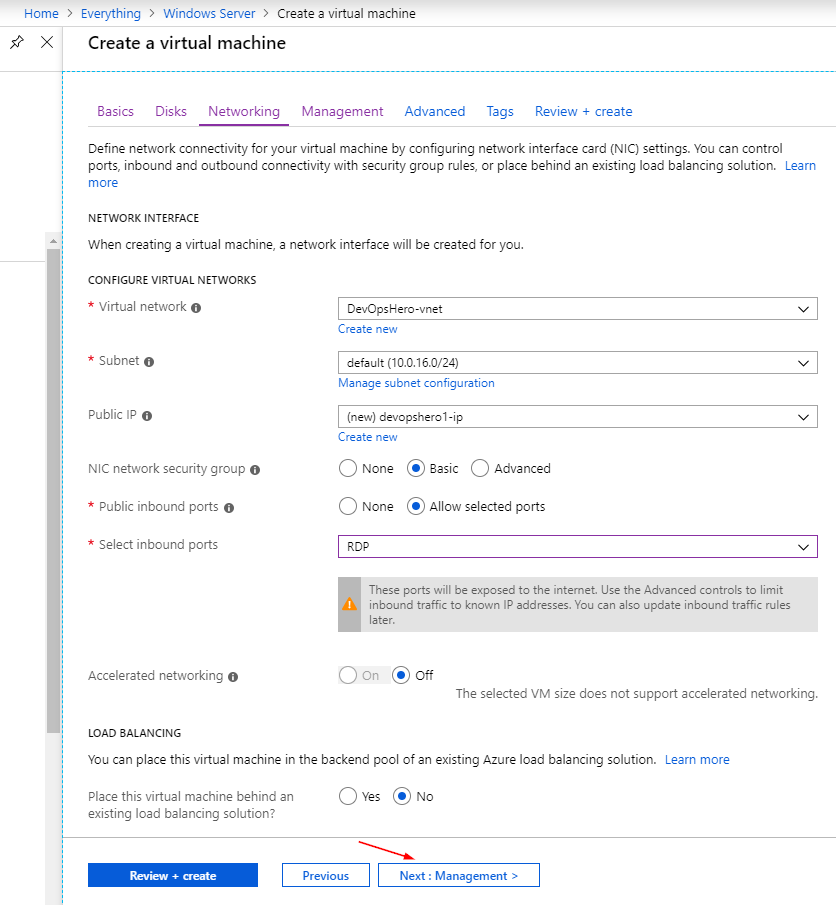
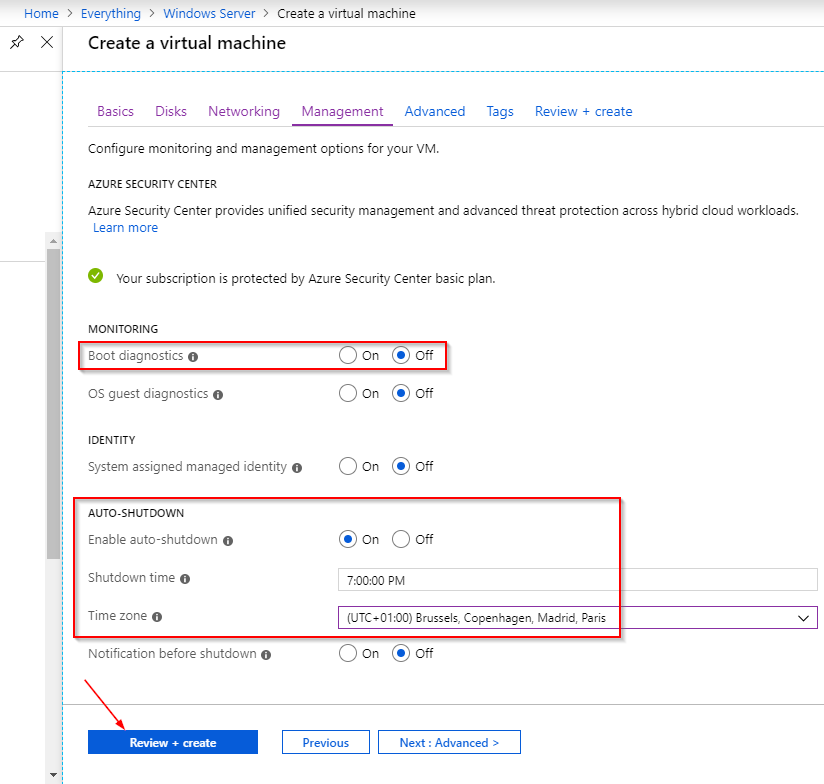
I’m turning off boot diagnostics because it’ll create a Storage Account, which for now is unnecessary complexity. If for some reason our VM won’t boot, it can always be turned on to help troubleshooting.
I’m also enabling auto-shutdown to save costs. Because a VM is only billed by the minute, it saves money shutting it down when we’re not using it. When we want to have it running around the clock, I can disable auto-shutdown.
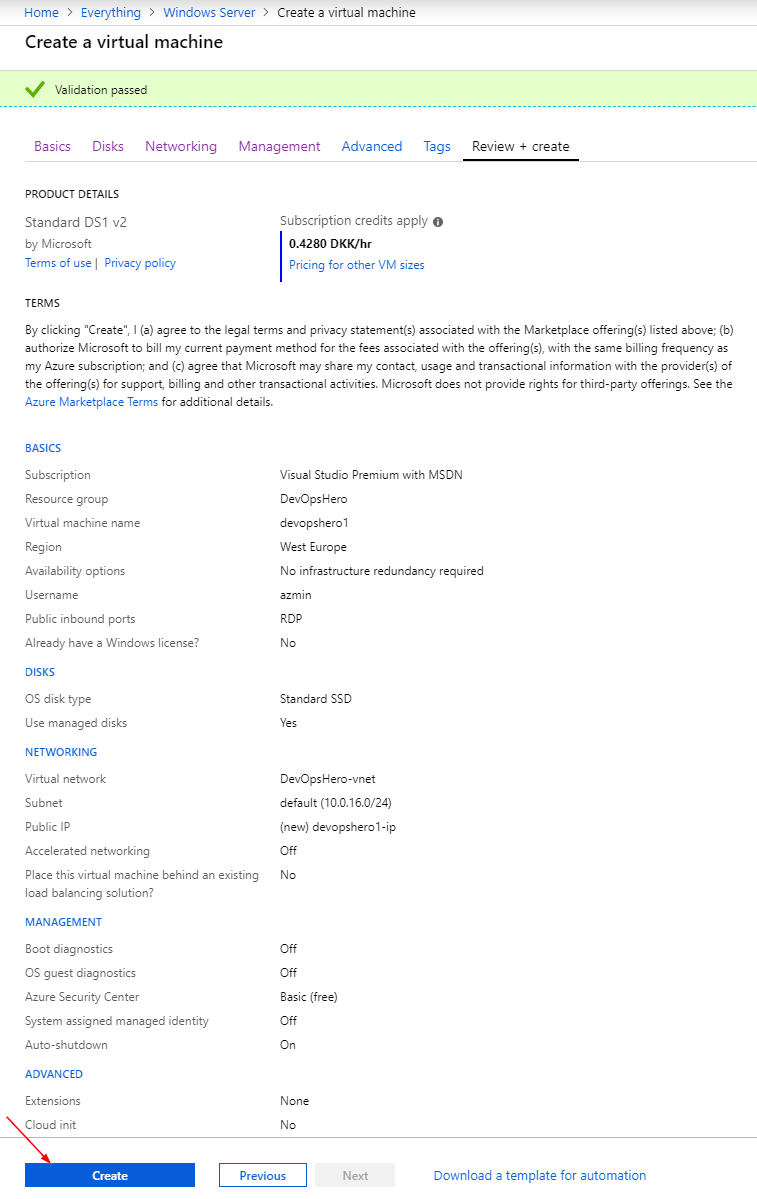
Here’s an overview of all the settings I did, now all there’s left for me is to press Create.
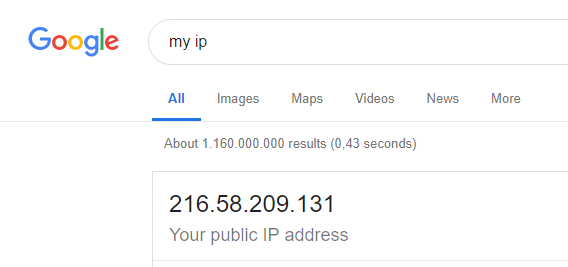
It takes roughly 10 minutes for the VM to get deployed. After it has been created, I want to make sure that no one but me can access it through RDP. The way I’m going to do that, is to limit which public IP can connect to RDP on my server, so the first step is to find my public IP.
Google makes it pretty easy.
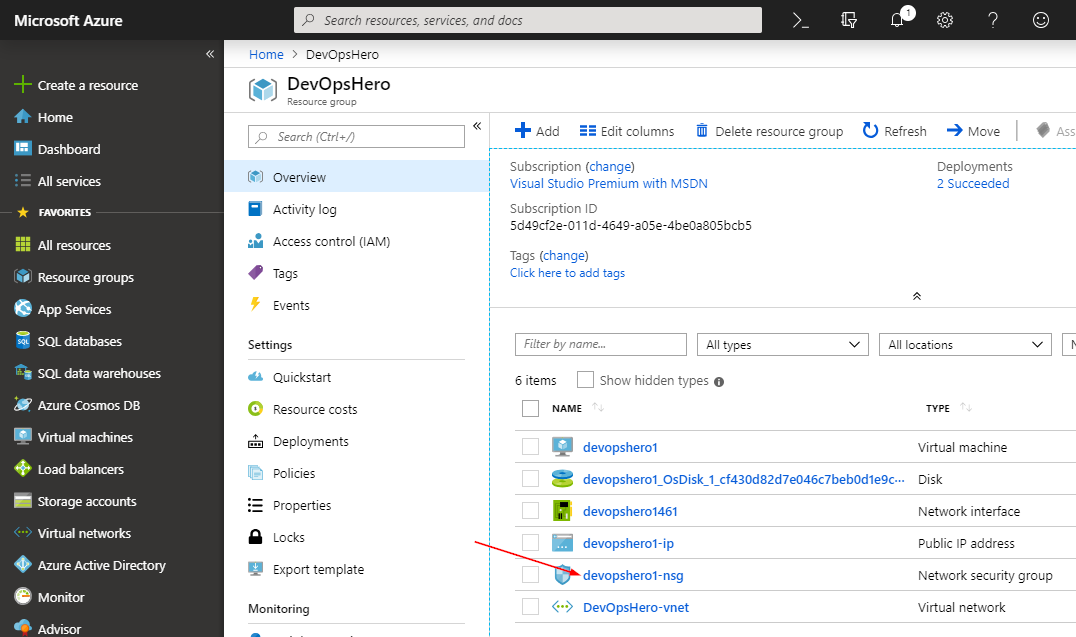
Now that I have my public IP, I’m going back to my resource group to find my Network security group (NSG), which controls network access to my VM.
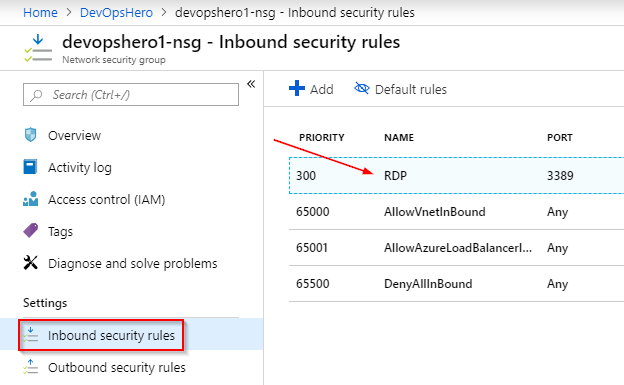
Once I’ve opened my NSG, I go to Inbound secutity rules, find the RDP rule and click on it to change it.
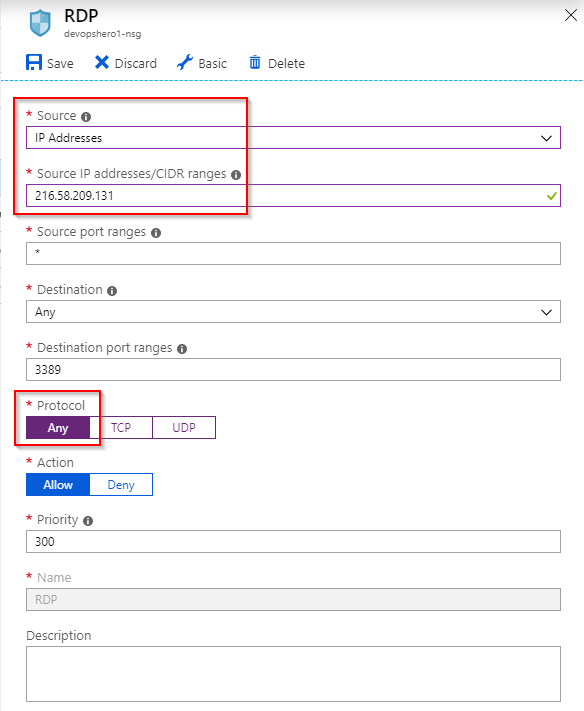
I change Source to IP Addresses and the field Source IP addresses/CIDR ranges appears, and I fill out my public IP address in it.
In Protocol I make sure to choose Any, because RDP supports UDP connections which should yield better performance.
It looks like our next focus points will be
We had a slow start with me rambling about the USA principle and Desire Paths, something that I’m fairly passionate about. Instead of just jumping in,
When I finally got started, we created a resouce group and put a brand new Windows Server 2019 VM inside it, and modified the firewall rules so that only we can RDP into it.